 Petnow
UI 커스터마이징
Client Custom UI를 카메라 화면에 커스터마이징하는 방법.
이 가이드를 시작하기 전에 기본 사용법을 완료하세요.
개요
PetnowCameraFragment는 카메라 UI를 클라이언트 요구사항에 맞게 커스터마이징 할 수 있습니다:
- 커스텀 UI 추가 - Client에서 Camera 화면에 커스터마이징 방법
- 트래커 위 가이드 UI 배치 - Client에서 FloatingGuide UI를 화면에 커스터마이징 방법
커스텀 UI 추가
커스텀 UI 레이아웃을 생성하고 모듈에 주입하여 카메라 화면 UI를 커스터마이징합니다.
class ClientCameraFragment : PetnowCameraFragment(), PetnowCameraDetectionListener {
    private var _binding: FragmentClientCameraBinding? = null
    private val binding get() = _binding!!

    override fun provideCustomOverlayLayout(): Int = R.layout.fragment_client_camera

    override fun onAttach(context: Context) {
        super.onAttach(context)
        setPetnowCameraDetectionListener(this)
    }

    override fun onCreate(savedInstanceState: Bundle?) {
        super.onCreate(savedInstanceState)
    }

    override fun onAddedCustomLayout(view: View) {
        super.onAddedCustomLayout(view)
        _binding = FragmentClientCameraBinding.bind(view) // 해당 함수에서 binding 객체 얻어야 합니다.

        binding.statusText.text = "Camera is ready"
    }

    override fun onDestroyView() {
        super.onDestroyView()
        _binding = null
    }

    override fun onDetectionStatus(primaryDetectionStatus: PetnowDetectionStatus) {
        when (primaryDetectionStatus) {
            PetnowDetectionStatus.Detected -> {
                // Success status
                binding.statusText.text = "Nose print scans are coming through!"
                binding.statusText.setTextColor(Color.GREEN)
            }

            // Distance issues
            PetnowDetectionStatus.TooClose -> {
                binding.statusText.text = "It's too close! Stay away from your pet's face about a handspan."
                binding.statusText.setTextColor(Color.RED)
            }
            PetnowDetectionStatus.TooFarAway -> {
                binding.statusText.text = "It's too far! Stay away from your pet's face about a handspan."
                binding.statusText.setTextColor(Color.RED)
            }

            // Lighting issues
            PetnowDetectionStatus.TooBright -> {
                binding.statusText.text = "It's too bright! Try in a place with less light."
                binding.statusText.setTextColor(Color.RED)
            }
            PetnowDetectionStatus.TooDark -> {
                binding.statusText.text = "It's too dark! Try in a place with more light."
                binding.statusText.setTextColor(Color.RED)
            }
            PetnowDetectionStatus.ShadowDetected -> {
                binding.statusText.text = "Adjust the lighting to avoid shadows on the nose."
                binding.statusText.setTextColor(Color.RED)
            }
            PetnowDetectionStatus.GlareDetected -> {
                binding.statusText.text = "Too shiny! Wipe the nose or adjust the lighting."
                binding.statusText.setTextColor(Color.RED)
            }

            // Clarity issues
            PetnowDetectionStatus.TooBlurred -> {
                binding.statusText.text = "Move back and forth slowly to focus!"
                binding.statusText.setTextColor(Color.RED)
            }
            PetnowDetectionStatus.MotionBlurDetected -> {
                binding.statusText.text = "Too shaky! Be aware of your moving hand and dog."
                binding.statusText.setTextColor(Color.RED)
            }
            PetnowDetectionStatus.DefocusedBlurDetected -> {
                binding.statusText.text = "Move back and forth slowly to focus!"
                binding.statusText.setTextColor(Color.RED)
            }

            // Angle issues
            PetnowDetectionStatus.NotFrontFace -> {
                binding.statusText.text = "Point the camera at the front of the face - only the front works."
                binding.statusText.setTextColor(Color.RED)
            }
            PetnowDetectionStatus.NotFrontNose -> {
                binding.statusText.text = "Point the camera at the front of the face - only the front works."
                binding.statusText.setTextColor(Color.RED)
            }
            PetnowDetectionStatus.NotFrontCatFaceHor,
            PetnowDetectionStatus.NotFrontCatFaceTop,
            PetnowDetectionStatus.NotFrontCatFaceBottom -> {
                binding.statusText.text = "Align the camera with the cat's face."
                binding.statusText.setTextColor(Color.RED)
            }

            // Obstruction issues
            PetnowDetectionStatus.NoseNotFound -> {
                binding.statusText.text = "Be careful not to cover or sway the nose."
                binding.statusText.setTextColor(Color.RED)
            }
            PetnowDetectionStatus.FurDetected -> {
                binding.statusText.text = "Make sure fur isn't covering the nose/face."
                binding.statusText.setTextColor(Color.RED)
            }
            PetnowDetectionStatus.FakeDetected -> {
                binding.statusText.text = "Fake Detected!!"
                binding.statusText.setTextColor(Color.RED)
            }

            // Default case
            else -> {
                binding.statusText.text = "Align your pet's face in the frame"
                binding.statusText.setTextColor(Color.WHITE)
            }
        }
    }

    override fun onDetectionProgress(progress: Int) {
        binding.detectionProgress.progress = progress
        if (progress == 100) {
            binding.statusText.text = "Detection Finished"
        }
    }

    override fun onDetectionFinished(result: DetectionCaptureResult) {
        when (result) {
            is DetectionCaptureResult.Success -> {
                val (noseImages, faceImages) = result
            }
            is DetectionCaptureResult.Fail -> {

            }
        }
}
provideCustomOverlayLayout() :
XML 커스텀 한 Layout을 만들어서 UI 모듈에 해당 함수로 주입
onAddedCustomLayout(view: View) :
클라이언트에서 생성한 커스텀 뷰가 Inflate가 완료된 후 해당 함수 호출
클라이언트에서 생성한 UI 조작 시 해당 함수에서 inflated 된 view를 받은 이후에 조작하면 됩니다.
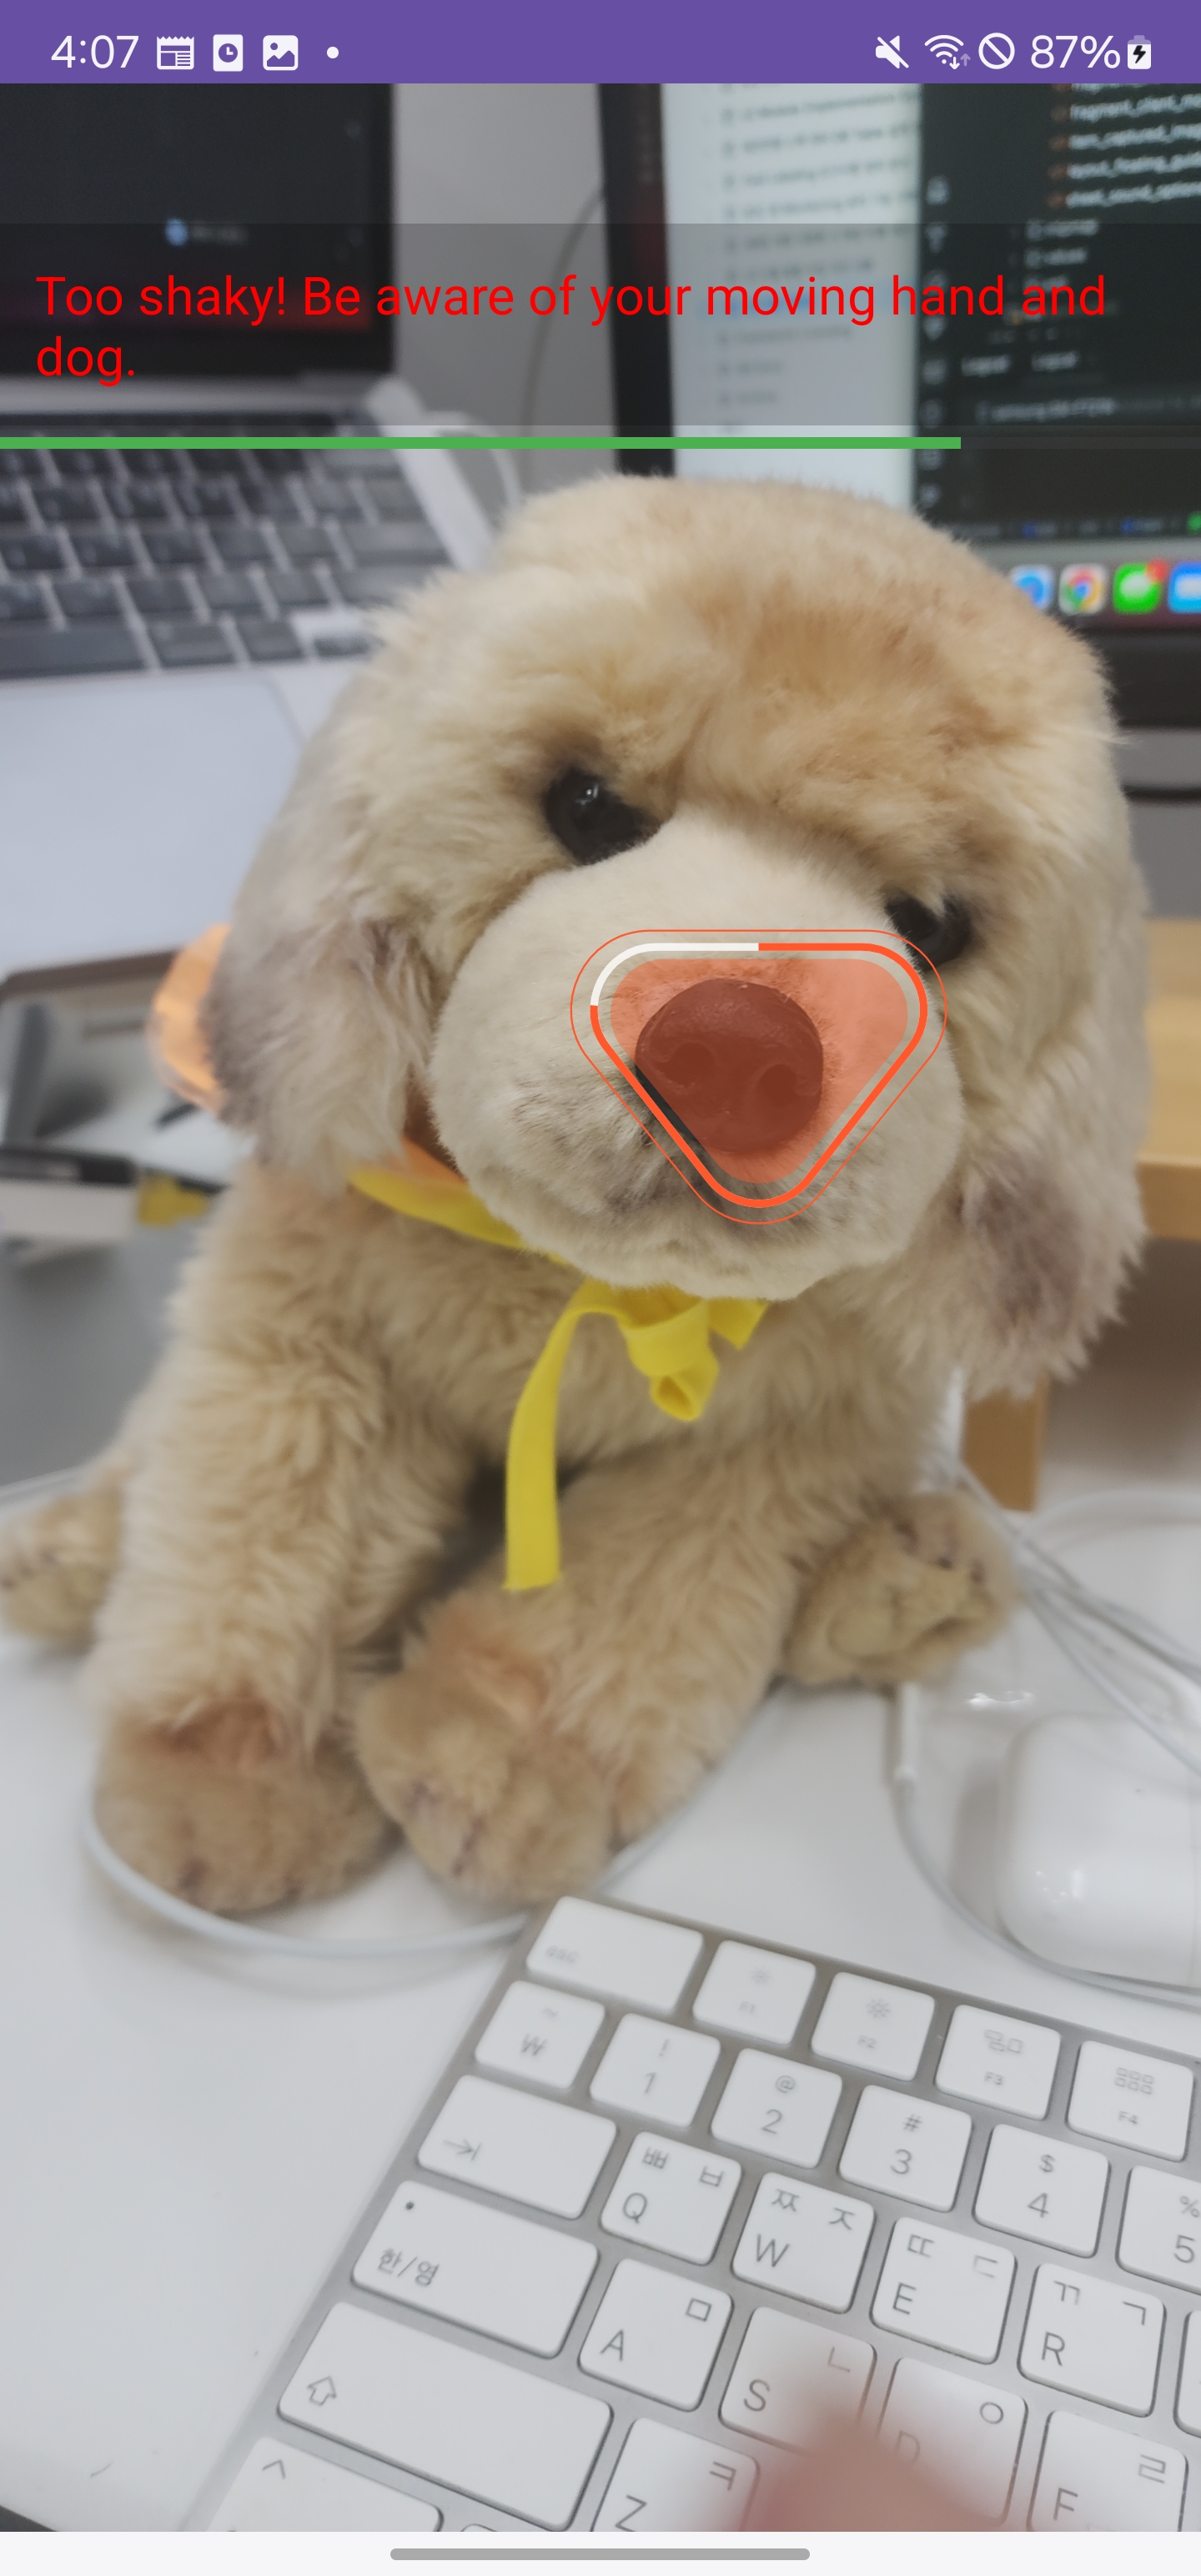
커스텀 UI 실행 화면
위 코드처럼 프래그먼트를 구성해 실행하면 카메라 화면에는 기본 Tracking UI와
클라이언트에서 생성한 UI가 렌더링됩니다.
트래커 위 가이드 UI 배치
가이드 UI를 생성하고 모듈에 주입하여
TrackingUI 위에 떠다니는(같이 움직이는) 가이드 UI를 커스터마이징합니다.
- TrackingUI에 맞춰 UI 모듈에서 좌표 설정 및 Rendering을 자동
- 앱에서는 어떤 UI를 그릴 것인지 명시
- 해당 메소드들은 Optional
class ClientCameraFragment : PetnowCameraFragment(), ... {
  private var _floatingBinding: LayoutFloatingGuideBinding? = null

  override fun provideFloatingGuideLayout(): Int = R.layout.layout_floating_guide

  override fun onFloatingGuideAdded(view: View) {
    _floatingBinding = LayoutFloatingGuideBinding.bind(view)
    floatingBinding.layoutCameraGuideFloating.isVisible = false // infalted 즉시 화면에 노출됨으로 false 설정
    _floatingBinding.textCameraGuideFloatingMessage.text = "플로팅 가이드 텍스트!"
  }
  ...

  override fun onDetectionProgress(progress: Int) {
        ...
        if (progress > 0) {
            ...
            floatingBinding.layoutCameraGuideFloating.isVisible = true
        }
    }

  override fun onDetectionFinished(result: DetectionCaptureResult) {
        when (result) {
            is DetectionCaptureResult.Success -> {
                val (noseImages, faceImages) = result
                ...
            }
            is DetectionCaptureResult.Fail -> {
                ...
            }
        }
        floatingBinding.layoutCameraGuideFloating.isVisible = false
    }
}
provideFloatingGuideLayout() :
XML 커스텀 한 FloatingGuideLayout을 만들어서 UI 모듈에 해당 함수로 주입
FloatingGuideAdded(view: View) :
클라이언트에서 생성한 FloatingGuide 커스텀 뷰가 Inflate가 완료된 후 해당 메소드 호출
클라이언트에서 생성한 UI 조작 시 해당 함수에서 inflated 된 view를 받은 이후에 조작하면 됩니다.
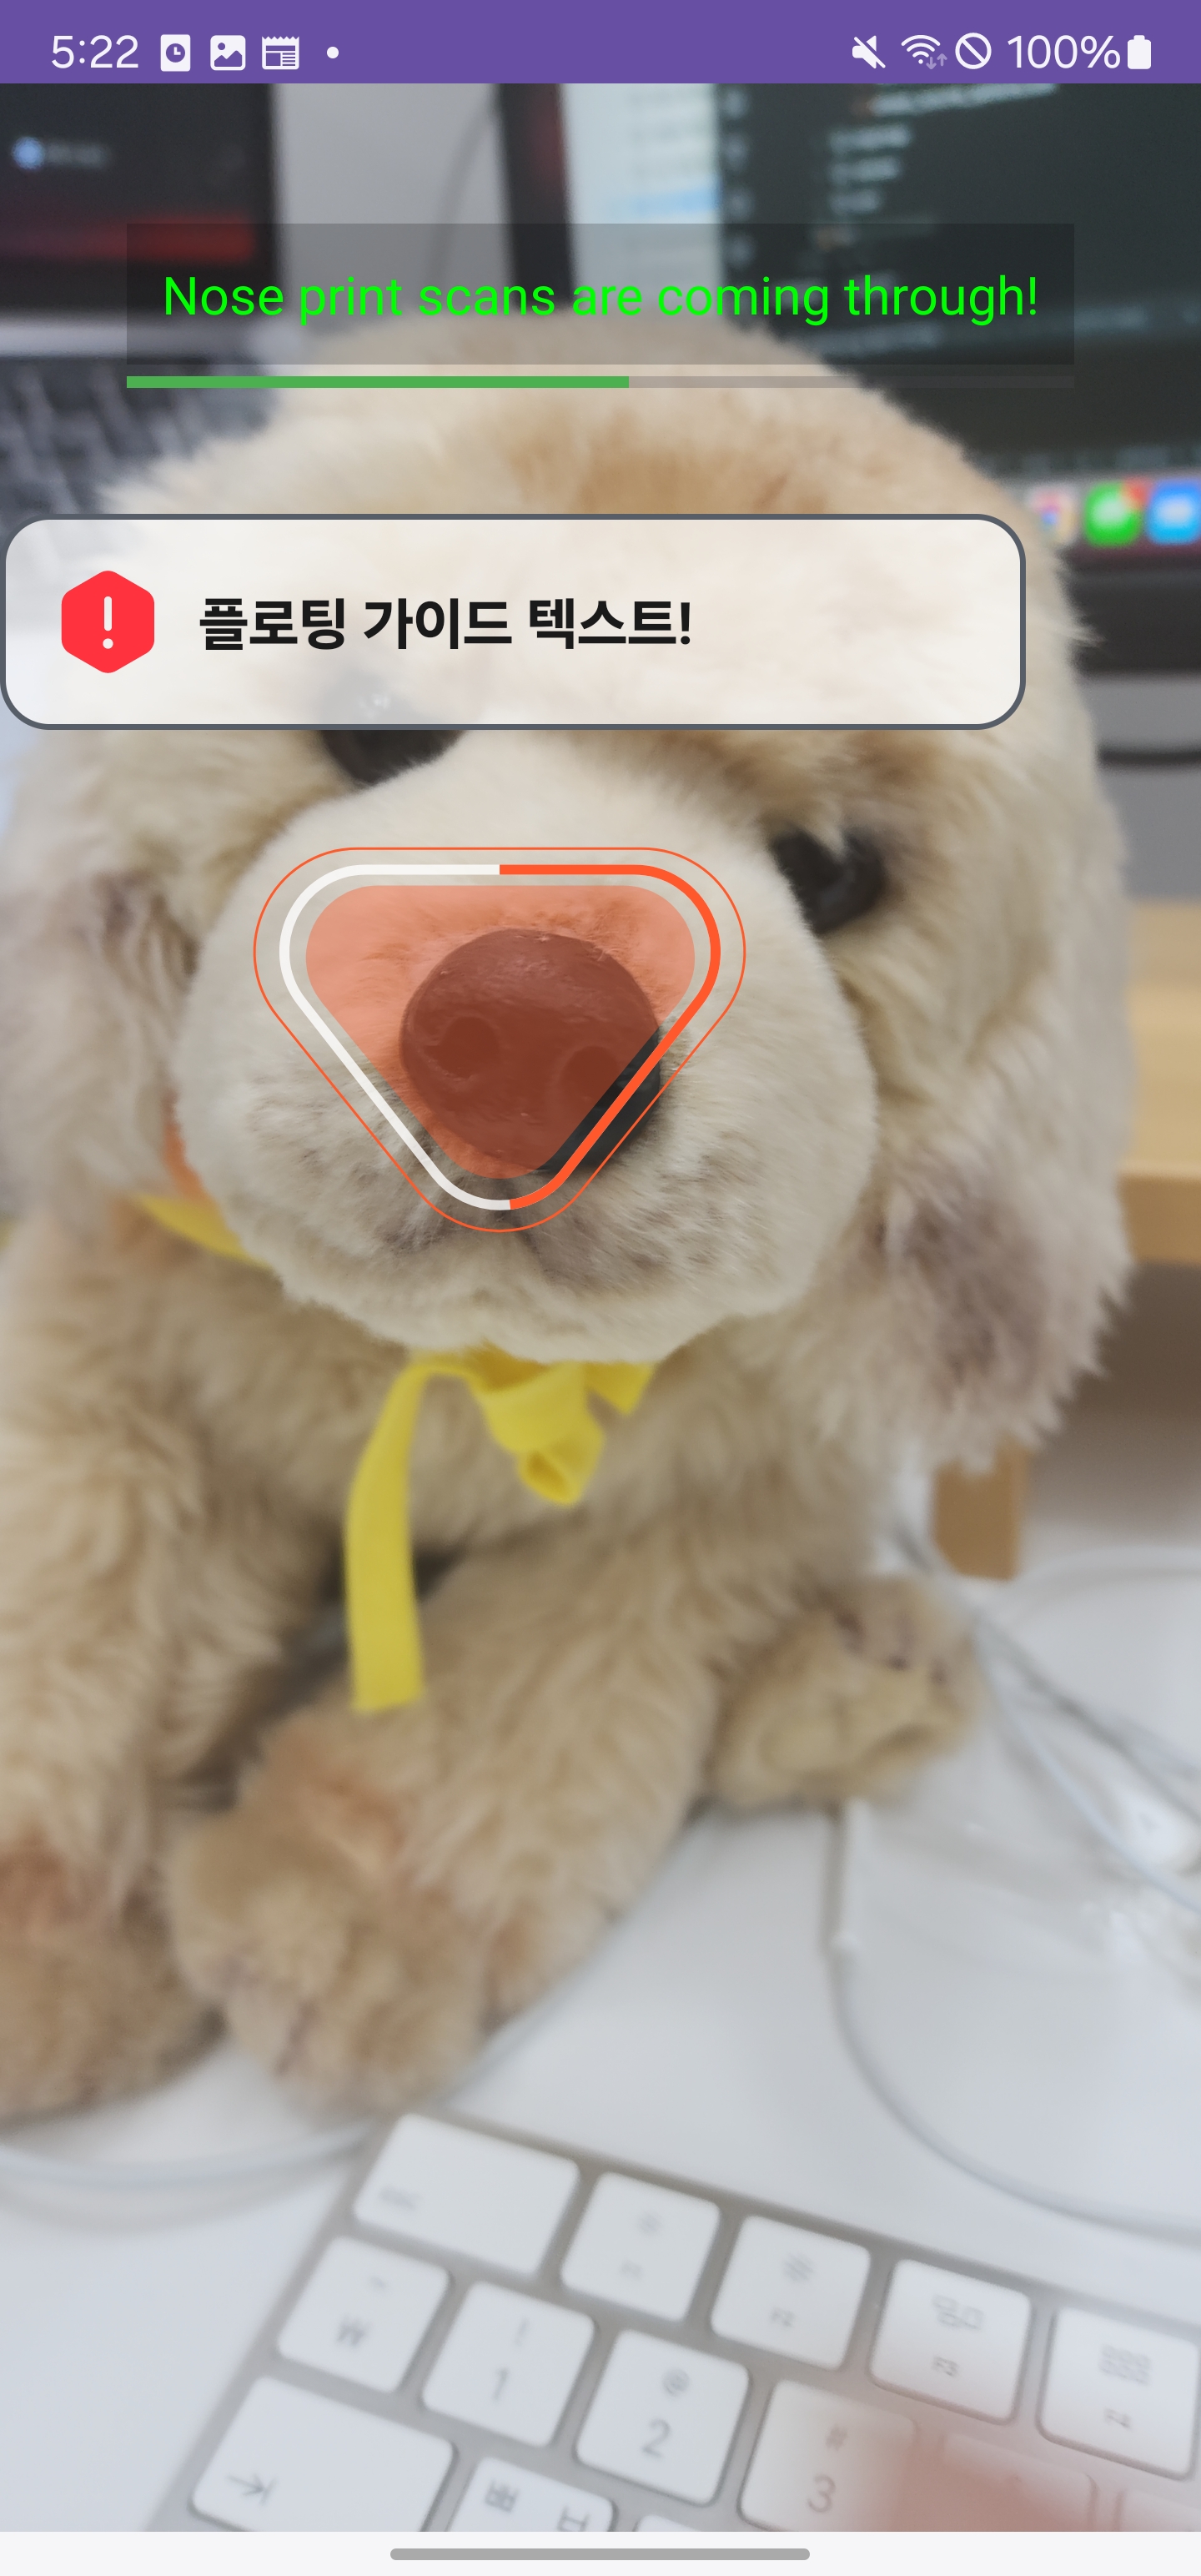
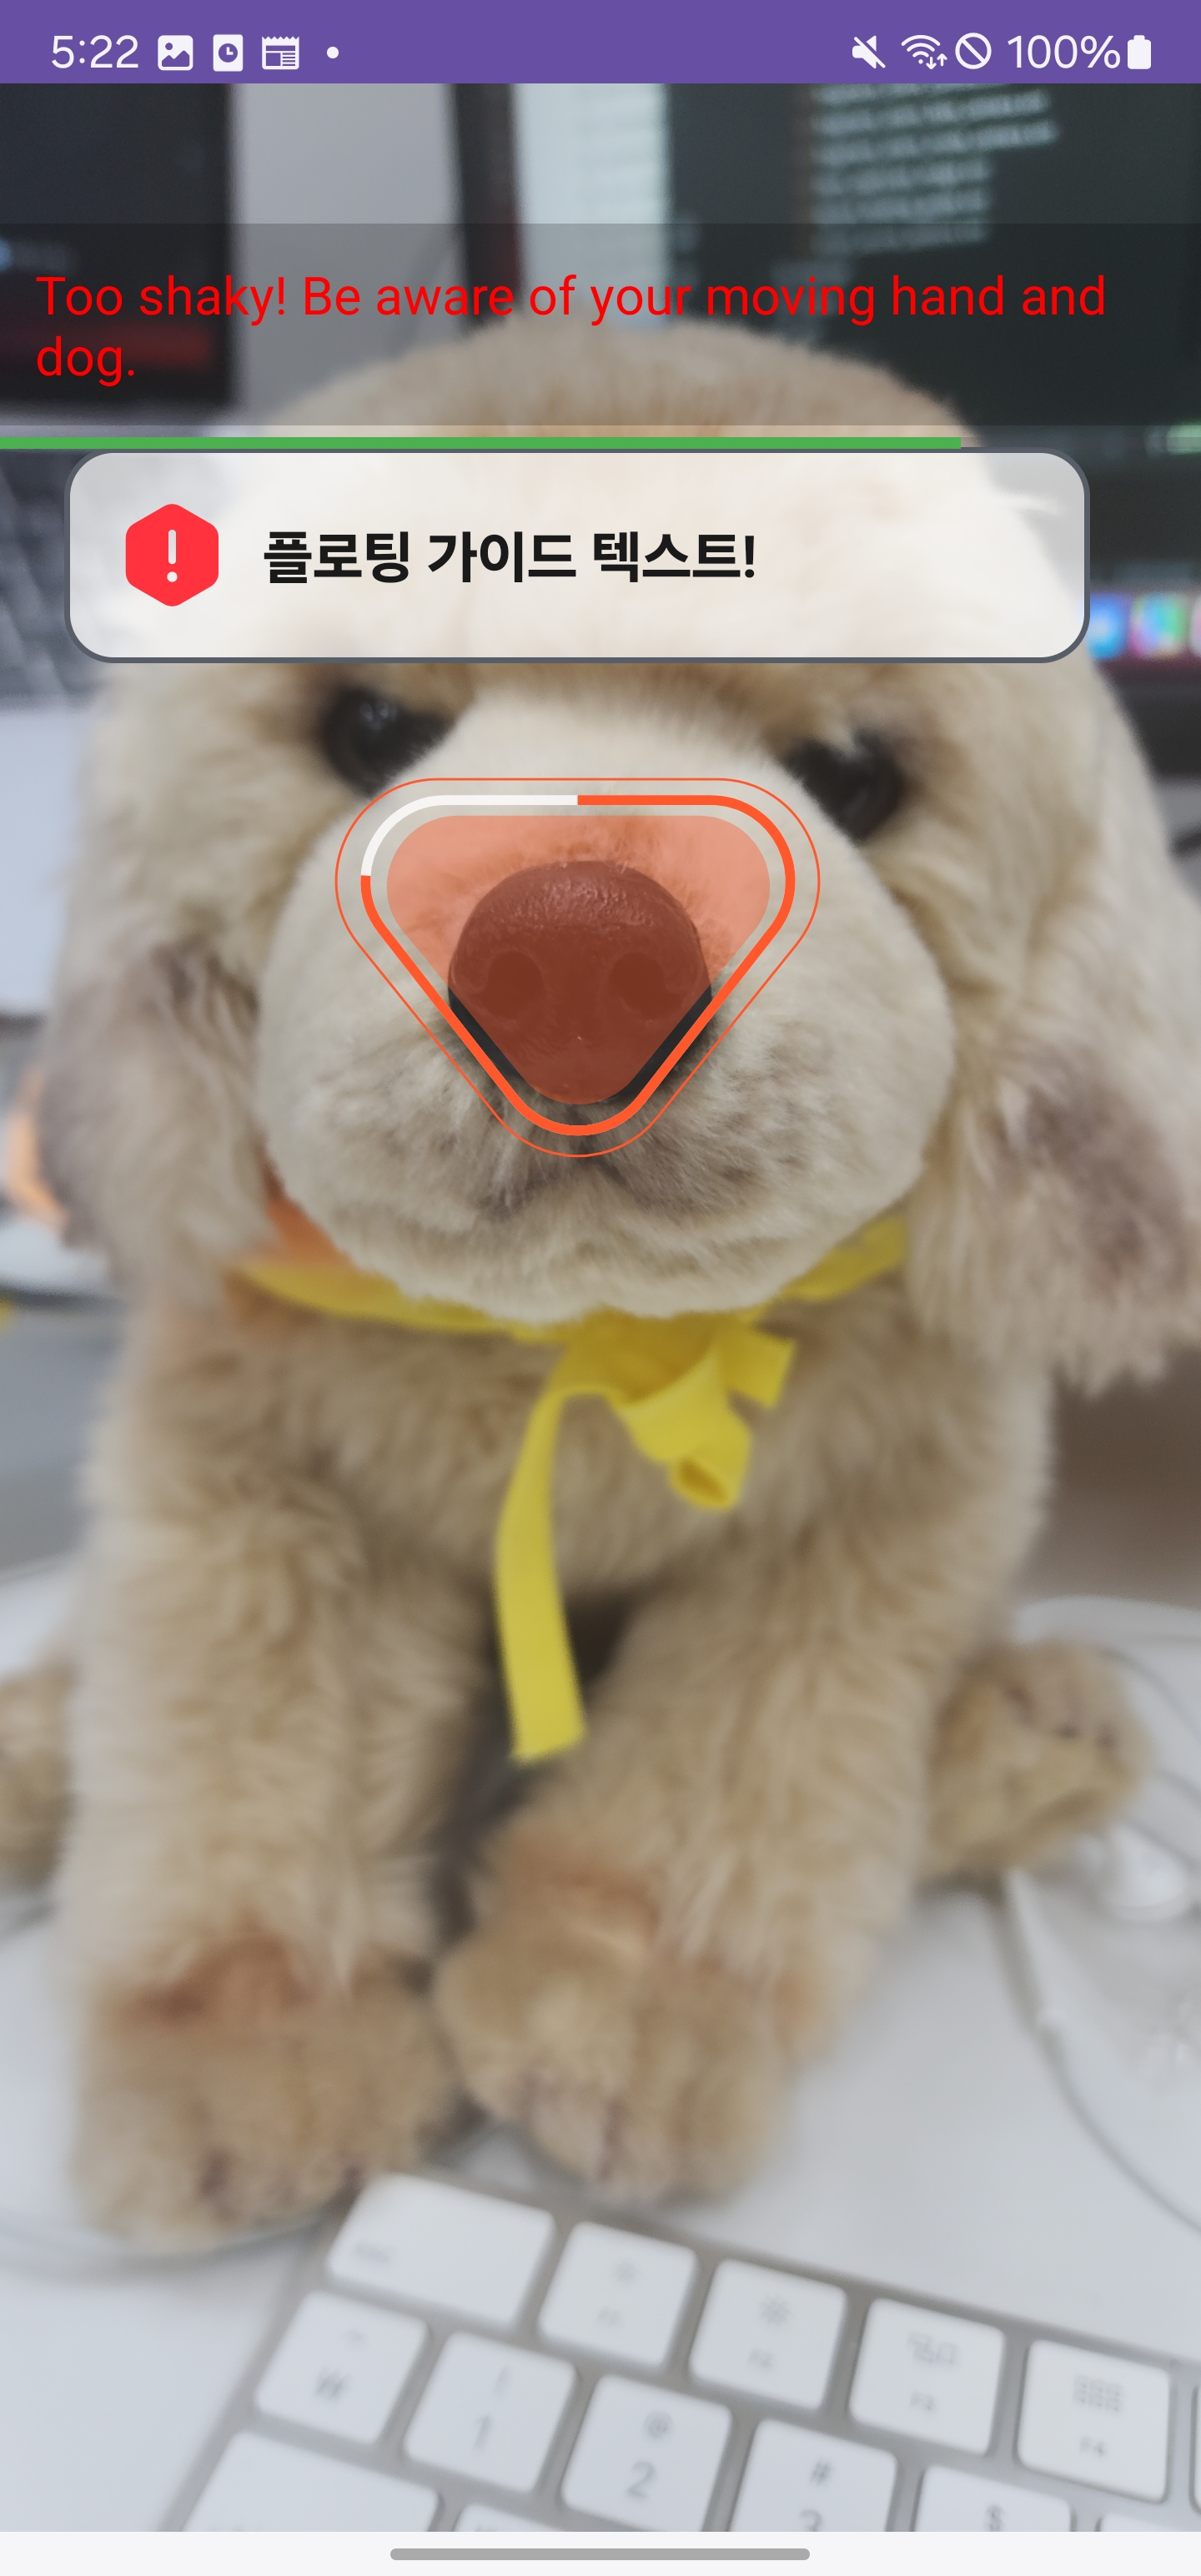
커스텀 Floating Guide UI 실행 화면
위 코드처럼 프래그먼트를 구성해 실행하면 카메라 화면에는 기본 Tracking UI위에
클라이언트에서 생성한 FloatingGuide UI가 렌더링됩니다.
다음 단계
UI 커스터마이징 방법을 익혔다면 다음 문서를 참고하세요: